How to Make LINE Stickers: From Zero to Your First Submission
A beginner's overview of making LINE stickers: the whole workflow, what you need, and how submission, sales and payouts work. No drawing skills needed. Start with 8 stickers from phone photos or AI art. Includes what I learned selling emoji and stickers myself.
Table of Contents
The short version: start with 8, five steps in total
A LINE sticker set comes together in five steps: create the artwork, remove the background, split it into single images, resize to the official spec, and submit. You don't need to draw. Phone photos or AI-generated art both work as source material.
You can choose 8, 16, 24, 32 or 40 stickers per set. Releasing your first set with 8 is the realistic choice. A bigger set means more work and more places to miss the spec.
You can't change the number of stickers after requesting review. Decide the count before you submit.
Four ways to make the artwork. Pick the one that fits you
Whichever you choose, what you need in the end is the same: one transparent PNG per sticker. Only the way you make the artwork differs.
- Generate it with AI … for people who don't draw. See Making LINE stickers with AI illustrations
- Use phone photos … popular for family and pet stickers kept private. See Stickers from photos
- Draw in ibisPaint or Clip Studio … for your own artwork. See Making stickers in ibisPaint and Clip Studio
- Make them animated … the spec is different. See How to make animated LINE stickers and emoji
Once the artwork is ready: transparency, splitting, sizing
After the artwork, every route follows the same steps. EzStampify needs no installation or sign-up and runs in your browser. Each step has its own detailed guide.
1. Background removal … All the ways to remove backgrounds
2. Splitting … cut several illustrations drawn on one canvas into separate PNGs. Batch splitting
3. Size and margins … match LINE's official spec. Getting size and margins right
4. Text … if you add any, it needs an outline that reads on any background. Text overlay guide
5. ZIP export and file names … submission needs specific file names. Auto-saving and zipping 40 images at once
You also need the main image (main.png) and the tab image (tab.png). Using Save as New lets you export a main version and a sticker version from the same source in one go.
From submission to sales: five stages from sign-up to payout
Q. How do I sell LINE stickers once they're made, and how much do I earn?
Once the images are ready, submit them on LINE Creators Market. After review passes, press the release button and the set appears in the LINE STORE. Source: the official LINE Creators Market How to use.
1. Register as a creator … enter the required information. A LINE account is needed
2. Enter text and upload images … fill in the title and description, then upload your images
3. Review … request a review against the sales standards. The official LINE Sticker Maker page says review takes about 2 days (as little as a few hours). In my case it took 3 to 5 days
4. Start selling … after approval, press the release button and sales begin in the LINE STORE. You can pick the price from several options
5. Receive your earnings … 50% of sales, after the platform fee (26% for Apple App Store in Japan from January 1, 2026; 30% for Google Play and the LINE STORE), is paid out. You can request a payout once your balance exceeds 1,000 yen, and a domestic bank transfer costs 495 yen. Source: LINE Creators App Help
Setting a set to private keeps it from going on sale, so it's just for you and your family. You still have to buy it yourself to use it. The price can change, so check LINE's official information when you submit.
Stickers submitted from LINE Sticker Maker (the phone app) earn no revenue share (unless you choose the paid-download option). If you want income, submit through LINE Creators Market.
The reality of sales: many people start at 0 to a few hundred yen
In creators' own accounts, sales right after launch are often 0 to a few hundred yen. Public examples include 375 yen over about 40 days (10 sales) and 465 yen in May for 9 stickers.
You can't request a payout until your balance passes 1,000 yen, and a transfer costs 495 yen. Treat the first few months as practice at making and releasing, not as income, and you'll be less disappointed.
Results vary. In my case, in the next section, text emoji that matched demand brought sales of around 10,000 yen when I published them. You can't tell what will sell until you release it, so start with 8 and watch the response.
What I actually made and sold: emoji and stickers on the LINE STORE
I sell emoji and stickers on the LINE STORE.
- Why I started … I use custom Slack emoji with coworkers every day. When LINE let people pick any emoji for reactions, I thought a Slack-like set would make chats more fun and smoother
- The first set had 40 items … I made the emoji with MEGAMOJI, a text-emoji tool, and the stickers with Gemini image generation
- About 3 hours to make … I took the Gemini images through a background-removal tool, split them in a slide tool, and resized them with a Mac image tool, juggling several tools. The slowest part was turning finished images into the submission format
- 3 to 5 days to approval … from submitting to going on sale
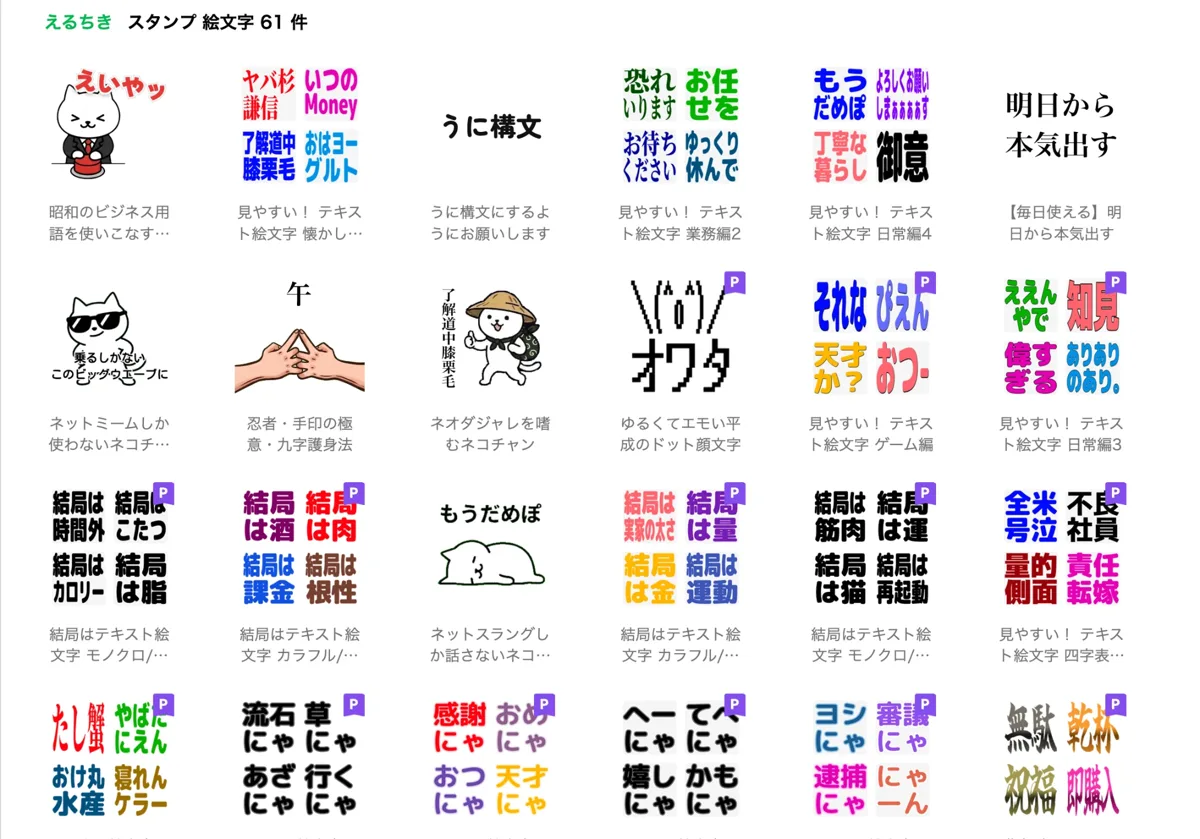
- Text emoji sold best … business phrases, four-character idioms, block lettering. No drawing skill needed, and a simple look that avoids the generic AI style worked well. When I published the sales results on note, monthly sales were around 10,000 yen. Averaged over the whole period since launch, it comes to roughly 5,000 yen a month
You don't have to draw. What actually sold was text emoji, not illustrations. Start with 8, watch the response, then add more.
When I used EzStampify, everything after adding the images took about 15 minutes. Handling transparency, splitting and resizing in one place cuts down the 3 hours I spent juggling tools.
Avoiding rejection
First submissions most often fail on size, margins or transparency. Check this list before you submit.
- Is the background cleanly transparent?
- Is there appropriate margin on all four sides?
- Are the main, tab and sticker images all there?
- Do the tags (used for suggestions) match the artwork?
- Does anything infringe copyright or public order and morals?
For reasons and fixes, see Avoiding rejection and the review FAQ.